
I have still been finishing old UFO's. I'm pleased to get some things done, but when I clean areas of the studio, I am finding more yarn that I bought for projects and it is just stacking up.
My son moved out and is clearing out his bedroom, and unfortunately I am moving boxes in there to get the studio cleared and cleaned. We made a deal, he will continue to take his stuff out if I will continue to get mine put away also. (We want to get the room cleared up and put in a desk, sofa bed and make a nice extra room to relax in and give my DH a space for his computer that is comfortable. I do plan to move my Baby Macomber down into that room...we have to have a loom in every room!)
I have to show you the pumpkins that my DD and I did in a class. I saw the sample from another teacher at Pioneer Craft House and had to set up a class with her.
The pumpkins are zentangle drawing on the fake pumpkins that they sell everywhere. You need a Sharpie oil pen and then you just get going. The small one is my DD and she made very dense patterns. Mine is the larger pumpkin and I divided the spaces up and just started going. Today I was adding some more lines, a few white dots and patterns and putting some gold bits on. Like my friend said, I will just keep adding stuff to it until I ruin it... I think they will look great with my grinning pumpkin man from the sister date. I wish I had the soot sprites, they would look great with it, but they went to my sons house. I still have several eyes and a ton of yarn so I could knit up some more.
My new weaving project is towels for my sister's big birthday. She turned 50 while we were in Europe together, but we are having the birthday luncheon next month, finally. I had her pick out some colors and I have been thinking of the pattern I want to use for about a year.
Last time at Intermountain Weaver's Conference, I took a class from Robyn Spady. She introduced us to a wide group of weave structures. These were unusual, most I had seen and read about, but this class give me a chance to weave and try them out...including velvet!
 If you have a chance, take a class from her. She is a great teacher and loves to share what she knows. I learned a lot in the class, and after 30 years of weaving, I very seldom can say that after a class.
The first structure that I wanted to try from this class is her "Better that basket weave". This weaving looks like basket weave, but has tie-downs to make it a structurally sound fabric.
I know Sharon Alderman worked out a version of this structure in her book "Mastering Weave Structures", so that is another place to look up how to weave it.
I love the look of the pattern, sorry I was bad and did not wash the sample. In the two color areas, you can see the tie-downs. In Robyn's towels, these were less visible...she had washed her towels, of course!
Yes, I am copying Robyn. She made her towels in three large blocks of color, and I will be doing the same. The sample shows the way the blocks are set up.
 I loved the look and of course the pattern is the same on the other side. Robyn suggests setting the yarns closer that with plain weave, for the 8/2 cotton she suggested 24 epi.
Her towels were great and I decided that a light, a medium and a dark value would be great for my sister's towel also. But when I presented my sister with the available colors from UKI, she picked out middle value for two of the colors. Oh well, they are to match her new kitchen after all! (I decided on the UKI, because they had a sale on the available colors.) I went through the color card and along with my sister's colors, I picked out some for me to have on hand for further weaving.
It's never easy is it? The green that she wanted was out, so I ordered another light green and I planned to over-dye the yarn to get a good color.
After thinking about the dye problem (I had just over-dyed two and a half pounds of yarn for another project where the available color did not work), I decided to try the net. I asked all the lists that I am on if anyone had that green that I could buy. I received a number of suggestions, but not yarn. I decided to contact other yarn stores, as per suggestion, to see if they had any on hand and found some! I ordered the yarn (it was more expensive, but less work than the dye job) and I got notice from another weaver who had checked the stash and found some. Many thanks to the weaver, but mine was in the mail!
 So now I have the three colors. I decided on a darker neutral in the center of the towel, so all the colors are closer in value.
Tonight I'm going to the Witches Halloween party with Mom and my sisters and next week my family has reservations to see "The Wave" in southern Utah. So I hope to have the towels on the loom next weekend and get going on them. The birthday party is next month, so I don't have much time.
My son moved out and is clearing out his bedroom, and unfortunately I am moving boxes in there to get the studio cleared and cleaned. We made a deal, he will continue to take his stuff out if I will continue to get mine put away also. (We want to get the room cleared up and put in a desk, sofa bed and make a nice extra room to relax in and give my DH a space for his computer that is comfortable. I do plan to move my Baby Macomber down into that room...we have to have a loom in every room!)
I have to show you the pumpkins that my DD and I did in a class. I saw the sample from another teacher at Pioneer Craft House and had to set up a class with her.
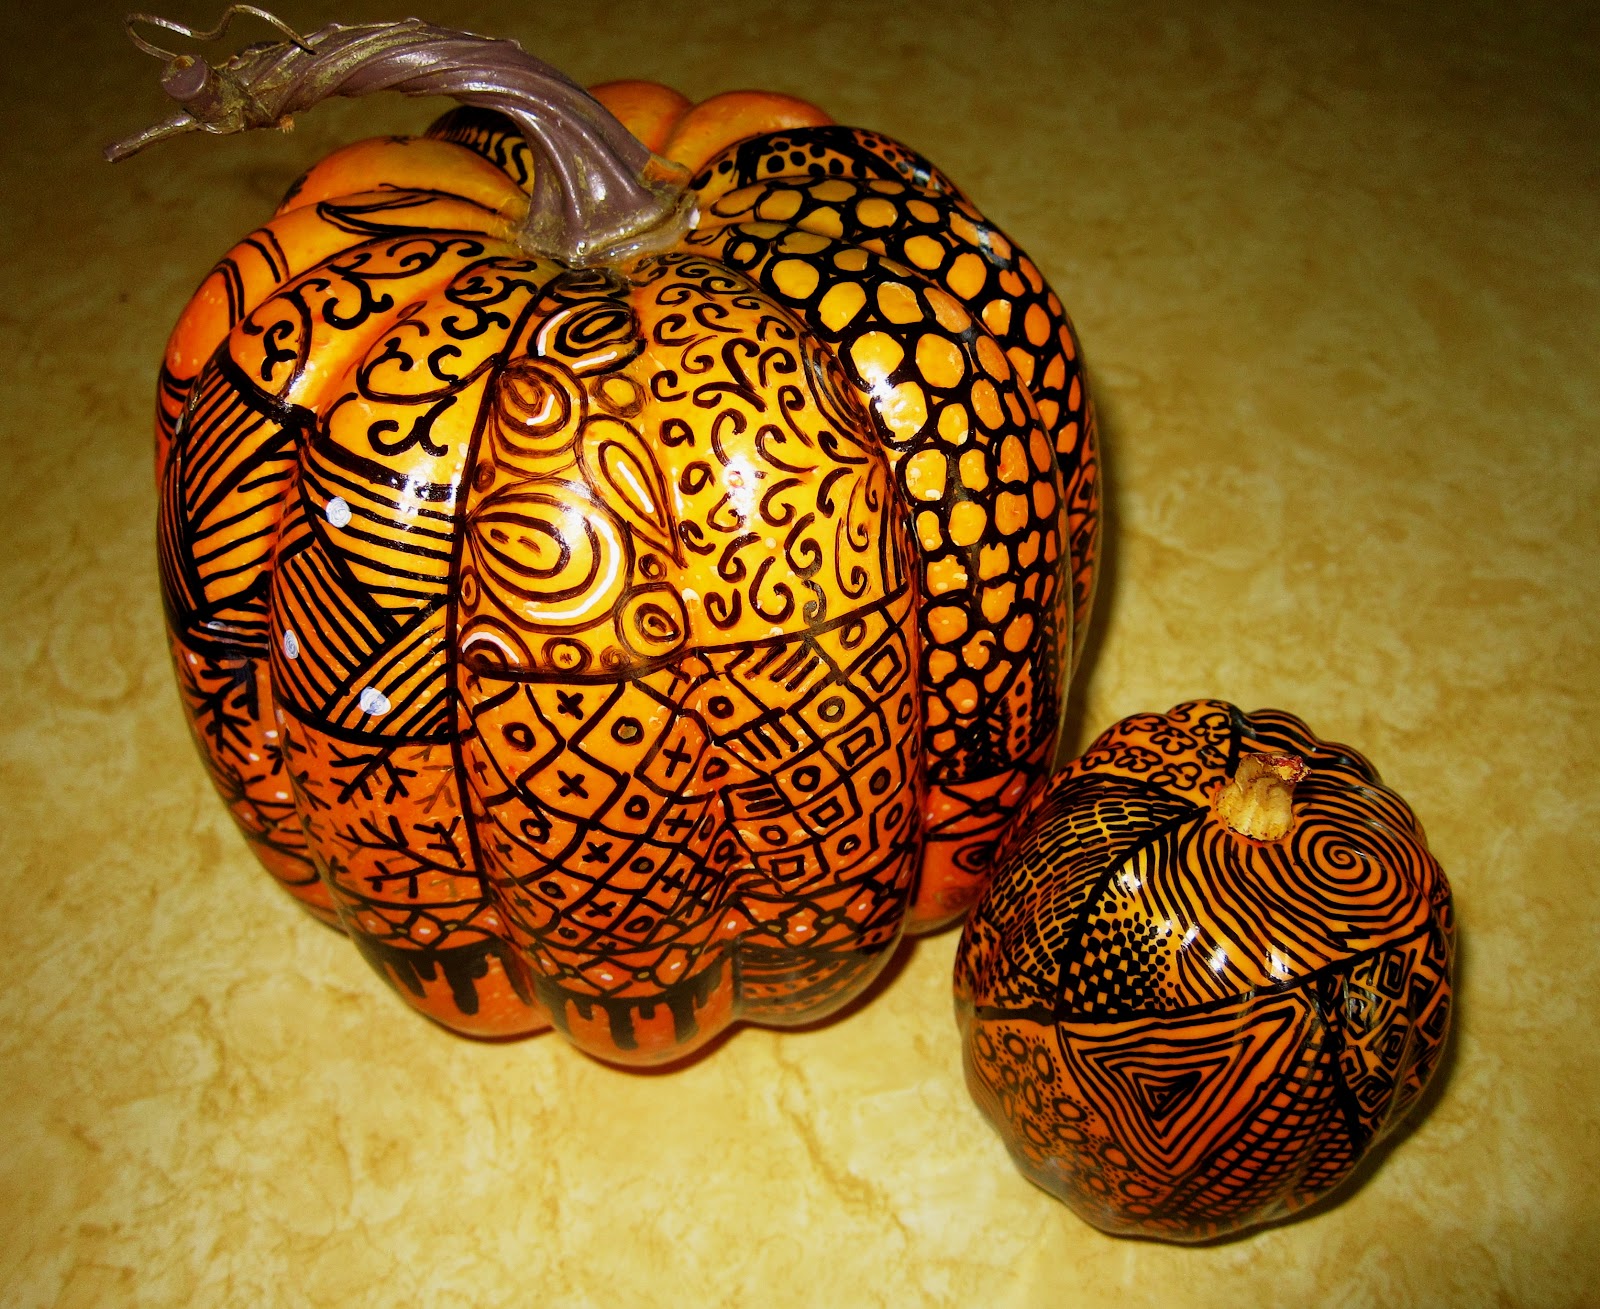 |
| Our new Halloween Decorations |
My new weaving project is towels for my sister's big birthday. She turned 50 while we were in Europe together, but we are having the birthday luncheon next month, finally. I had her pick out some colors and I have been thinking of the pattern I want to use for about a year.
Last time at Intermountain Weaver's Conference, I took a class from Robyn Spady. She introduced us to a wide group of weave structures. These were unusual, most I had seen and read about, but this class give me a chance to weave and try them out...including velvet!

The first structure that I wanted to try from this class is her "Better that basket weave". This weaving looks like basket weave, but has tie-downs to make it a structurally sound fabric.
I know Sharon Alderman worked out a version of this structure in her book "Mastering Weave Structures", so that is another place to look up how to weave it.
 |
| Doesn't this look great...8/2 cotton |
Yes, I am copying Robyn. She made her towels in three large blocks of color, and I will be doing the same. The sample shows the way the blocks are set up.

Her towels were great and I decided that a light, a medium and a dark value would be great for my sister's towel also. But when I presented my sister with the available colors from UKI, she picked out middle value for two of the colors. Oh well, they are to match her new kitchen after all! (I decided on the UKI, because they had a sale on the available colors.) I went through the color card and along with my sister's colors, I picked out some for me to have on hand for further weaving.
 |
| Nile Green on the bottom, 2 strands of the yellow green I ordered. |
After thinking about the dye problem (I had just over-dyed two and a half pounds of yarn for another project where the available color did not work), I decided to try the net. I asked all the lists that I am on if anyone had that green that I could buy. I received a number of suggestions, but not yarn. I decided to contact other yarn stores, as per suggestion, to see if they had any on hand and found some! I ordered the yarn (it was more expensive, but less work than the dye job) and I got notice from another weaver who had checked the stash and found some. Many thanks to the weaver, but mine was in the mail!

Tonight I'm going to the Witches Halloween party with Mom and my sisters and next week my family has reservations to see "The Wave" in southern Utah. So I hope to have the towels on the loom next weekend and get going on them. The birthday party is next month, so I don't have much time.

.jpg)
.jpg)


