summer flowers

summer flowers

Friday, January 25, 2013

January Loom Review

I had to put two warps on two of my looms to get them looking better for the review.

My Big Macomber will always be my main loom.  I love weaving on it.  I hope I  will be able to for a long time.
Shawl fabric with handspun accents.
This loom did about 6 warps this year for a total of about 43 yards.

My Baby Wolf is the second loom.  I love this loom and have used it lots.  This loom lives in my bedroom, so I can thread at night, but not weave.  The weaving wakes my DH.
A warp for pillows 
I have added parts, taken it apart for cleaning (probably needs that soon) and enjoyed weaving on it.  This year it has woven about 8 warps for a total of about 45 yards.

My Baby Mac is the loom I use now for workshops and testing projects.  It has spent it's time in my living room, but with the Bergman and my DS moving out, I am now setting up a study in his old room and I want space for this loom in there.
This has a new S&W sampler, but it is going slow.
This loom has woven about 6 warps and about 15 yards.  Most of these warps are shorter because I use it for tests and classes.

My Dorothy is a loom I acquired by chance.  When I bought the Big Mac, at the last minute the owner threw in the Dorothy.  I want to add some more shafts to her to be able to test multi-shaft projects. 
Folded Dorothy with the workshop warp.

 I only use it when I need it, so this year I only put on 1 warp of 2 yards for a workshop.

The Bergman is a loom that has shown no change in the past year...why have I not worked on this loom?
12 shaft Bergman
I feel bad looking at the loom, I need to get some work on it.

This past year I have started teaching at Pioneer Craft House.  The studio came with eight floor looms and nine table looms.  Most of these looms have been around for many years or were purchased or donated as used looms.  Needless to say, the looms need lots of work...most have problems with the brakes and none have been cleaned or oiled in years.  The climate is so dry here, that wood really needs to be feed.
The table looms are mostly in great condition, the Schacht table looms are only a few years old and are great for my beginning students.
One of the eight Schacht table looms.


The first loom I worked on was the small folding HD loom.  I sanded and oiled and waxed the wood and replaced the leather shaft cords.  Here it is with the test loom.  It is working great.
HD with a test scarf warp.
The second loom I worked on is the first Hammett.  I cleaned the wood, oiled and waxed it.  I also put on new apron and apron strings on the back so that we could use this loom for sectional warping.  We also have an AVL Warping Wheel and with this loom, I reassembled the wheel and put on the warp.  I still am having problems with the shafts, I don't know as much about counter-balanced looms as I thought.  They take a lot of futzing around.
Hammett with the towel test warp.
The most recent loom I have been working on is the folding Gilmore.  They don't make these looms any more, but I have been emailing the company and they have helped me with the repairs to get this loom working.  It has had a very tough life.  The cloth beam had a piece gouged out at the end, dowels were missing from the lamn frame, and there is a lot of water damage.  I cleaned and oiled the loom, I replaced the dowels and now I am waiting for the parts delivery from Gilmore with the bumper pads for the shafts, treadle cords and apron straps.  I think it will be a good loom, I hope to put a lace sampler test warp on for my S&W class to weave.
Folding Gilmore waiting for last parts.


I have a student who wants to weave on the Macomber, so she is willing to do the cleaning and repair on that one.  I bought new string from Macomber to replace the apron warp strings that were cut off and I have taken several pictures of the brake system on my loom so that we can get the brake working.  The previous teacher had purchased the bolts and such, so we should have all the parts for the brake.
She has already started with the cleaning.
The second Hammett is next on my list.  The Pioneer Craft House was known for rag rug weaving and I am debating putting a long rug warp on a loom for people to rent for weaving.  I am not sure yet if there is demand, but this loom would be a good one.   I need to clean and oil it and I have ordered new heddles (I hate working with bent heddles that are out of order).
Hammett ready to start cleaning.
The big HD loom had a warp on it and after replacing the treadle rod, it is weaving.  We have used it for lace samples in the overshot class, but it really needs a good cleaning and oiling.  I would like to add some more treadle tie-ups so that we don't have to move any when we change tie-ups.
HD waiting for cleaning and oiling.

There is a second Gilmore.  This one is the model they still make, the compact.  This loom has a warp on it that a student is working on and the loom is in pretty good shape.  It of course needs cleaning and oiling, and I might add pegs to get the sectional beam back.  It would be nice to warp without paper!  The bumpers on the loom are like wood, so I ordered those parts when I ordered for the folding Gilmore.  I'm looking forward to seeing this loom clean and oiled, I learned to weave on a Gilmore and I have a soft spot in my heart for them.
S&W runner on the Gilmore.
The last of the floor looms is the Leclerc.  This loom is only four shafts, but it has a 60" weaving width.  This would be great to weave some blankets on.  I think there are weavers that would like to rent time on this loom for making large projects.  Unfortunately, the brake is put on wrong.  I think the previous owner gerry-rigged it to work with what she was weaving.  I will need to order parts and even a brake pedal to get this working.  The sectional beam was put on strange also.  It was not across the full width of the beam and I want to be able to weave the full 60 inches.
Corner of the Leclerc loom.

So, my goal for looms is to get at least one PCH loom a month, cleaned and weaving with no problems.  For each loom I get done there I need to clean and oil a section of the Bergman.  By the end of the year, I want my Bergman warped and working and I want nine looms at PCH being used by weavers and producing fabric.

Wow, I have lots to do...But I love making looms work correctly.  I want my students to have a great experience working on the looms we have.

Sunday, January 20, 2013

The Saga of the Four Warps

On January 8th I reported with great enthusiasm on my Facebook page that I had wound four warps.  I really thought I was on a roll.  I wanted to have all my looms warped up to start the new year.

The Big Mac had just been emptied after weaving my picnic napkins for the guild show.

Here's how they looked in the show.
I was in such a hurry to get them hemmed, and  I was able to get them in the show, so I was very happy.  These napkins had been on the list of things to do for quite some time. 

But there sat the empty loom.  I wound a warp of wool rug yarn for some pillows to go on my sofa.  I have some core-spun rug weft that I want to use....but that is as far as I got until today.

So here is the warp wound on the beam.
I have the warp wound around the beam, not threaded yet.  The loom is not officially "dressed", but it is not empty...!

My second empty loom is the Baby Wolf.  I had been working on the scarf that I designed while I was in Europe.  This is the Pont du Gard Lichen scarf.  I loved the lichen colors and ordered the yarn.  I finished weaving two scarves and took them off, twisted the fringes and entered the best one in the guild show.  Again, I was so excited to get it in the show that the loom sat for a few weeks.

Here is how it looks in the show.
This warp had more ends and actually was on the warp board unfinished for about a week.

The warp sat in the bag for a while until I could get to it.
This is a shawl based on a design by Sharon Alderman, using a handspun accent yarn and a heather 2/8 wool for the ground.

Again the loom is not dressed completely yet, but at least the warp is wound on the beam.
Ready to put the lease sticks in and thread the heddles.
The warp I had to get on a loom for the workshop was not a fun one to put on.  I was taking a workshop in Theo Moorman technique...so every 3rd warp was polyester quilting thread.  The warps were provided for us by the teacher and several of the fine threads did not get caught in the cross.  One of my biggest problems was warping the fine gray threads in a room with gray carpet...hard to see, plus the fine threads had a mind of their own and tended to jump out of the heddle that I had threaded them in.  In other words, not a fun warp to put on.

Here we are working away.
I did manage to get the warp done for the class.  And spent three days enjoying my weaving friends and trying some things with Moorman that I had not done much of before this workshop. I had done Moorman with threads, but only a little with fabric strips.

Here is my second sampler
I liked weaving the batik fabric as the ground and adding yarn for the pattern.  I designed my initials to weave a couple of panels that I can put into a bag....yeah, when am I going to get that done?

My fourth warp was a demonstration warp for my Summer & Winter weaving class.  Because the students work at home, I wanted to have a loom warped in class to show the techniques.  I had seen an old 20 inch Structo in the back of my loom closet and it had the wooden beams on the front and back, so I decided to use that.  (I don't like to work with the octagonal metal beams that so many Structo's have.  Those metal beams were made so that the pre-warped spools could be slipped on the beam.)  I had not looked at the loom closely, so the day I pulled it out I had quite an unpleasant surprise.  For some reason, back a number of years ago, someone had replaced the top heddle rod on shaft 4 with bailing wire.  It had been there so long is was even rusty.  I knew I would not be happy weaving on this even for a demo, so I took the shafts out to fix it...then decided the heddles needed to be put on in the correct order...and the wood was very dirty and needed a cleaning...then the poor wood needed some wax/oil/TLC.  
This did not turn out to be the quick warp for class.
Cleaned and waxed wood.
The loom had some damage, but seemed structurally sound.  I replaced the rubber bumpers beneath the shafts with felt and then put the newly corrected and repaired shafts back in the loom.  The warp was a small one for samples and did not take very long to warp.
You can see the replaced upper rod on shaft four.
  The Structo looked ready to go and it would be that perfect demo loom.  That way I did not have to use one of the Schacht table looms and I would be able to use them for the students.  I wove the first sample to show the class...well, I actually got about 4 inches done when the third shaft broke!!!
The metal weld broke on the two corners.
After all that work, I had to transfer the warp to one of the Schacht Table looms, and now I need to find a metal worker that can repair the loom.  I am not willing to give up on this loom.  I want to continue to use it for a demo loom...once I get it working.

So now you have the first part of the "Saga of the Four Warps".  Hopefully, the next episode will have more information about great weaving and less loom repair and problems.

Saturday, December 29, 2012

Felt

I do some felt work for a fiber processing business I work for.  This was one of the most interesting.  We got a request for a banner.  I had done some felting where I had a design, sometimes it slipped and sometimes I could keep the design distinct.  With this banner, I needed to keep the name looking good.  The company had given me a rough draft of the design the way he wanted it.

I admit I spent a lot of time just thinking about the problems and possible solutions...as usual I over-thought the whole thing.  You know the feeling after weeks of worrying about it, you start getting it done then look at it and realize that it wasn't that bad to do.  In this case, that was the result...a good one and I could not believe I had worried about it so much.

I had several batts that had been carded out of the wool from the sheep the company raises.  I started by laying out the color for the back of the banner and I made it 30% larger than the finished banner needed to be.
This is the brown back of the banner.
The wool was carded into eight ounce batts about 40" by 36", I just needed to tear them to size and overlap and blend the joins.  For the middle layer I used the white, then added a top layer of white so that the banner would have a nice background to put the design on.
The middle layer mostly covered the back color.
Here I have part of the top layer giving the white ground.
I alternated the "grain" of the batts for additional strength on the banner and with the three layers, I had a large batt laid out that was about 3 inches thick.
The thickness of the banner before wetting and felting.
I enjoyed looking at the smooth expanse of wool for a few minutes, then added the background pattern that he had designed.  To do this I was provided a roving of a fawn color to add "swirls" in the banner.
Swirls laid on the batt.
I was worried that the fawn did not have enough contrast with the background, but in the finished piece it looked great and did not detract from the lettering.
Close up showing the dimension of the roving on the ground.
In the pictures you can see the blue bubble wrap (actually pool cover) that I roll the piece in to put on the felting machine.  

At this point, I wetted down the whole piece, and left it to absorb the water while I cut out the letters.  I had pre-felted some 4 ounce batts to use for the letters and for the border around the banner.  As I cut them out, I worried that the pre-felt was not thick enough and the letters would look transparent.  As it turned out, they looked fine and I felted them to the banner with a pad sander that I have used for felting some years ago.
Letters worked out great.
I had put the felt through the roller first, but the letters need something additional to adhere them so they would felt into the background fabric.
My trusty sander doing it's work.
I dug out my old sander from my previous work with felting (some 5 years ago), and worked over each letter and the border until they began to felt together.  I had sponged off some of the water, because I had problem with the fibers slipping out of place if the felt was too wet when I started processing.  A batt of felt this thick really took some extra felting to get it felted through all the thickness.
The felting machine is know as Proud Mary...she just keeps rolling...rolling...
I rolled the banner up in the bubble wrap and put it in the felting machine.  The machine just does the rolling for me.  Instead of me bending over the table and rolling the piece back and forth, I put it in "Proud Mary" and go back to the studio and weave.  After the set time, I have to come  back out and unroll the piece and roll from the other direction.  The felt is more processed on the outer sections of the roll, so I need to re-roll several times to keep the felting consistent along the complete length of the banner.  Proud Mary helps with the processing, but I still need to direct it to get a good finished product.  (Because felting is a wet process, I keep the felting machine in our heated garage...too bad we do not have room for a car in there any more.)

I even had to fold the banner in half and to process the middle section, because of the two yard length.  But in the end the banner worked out great and I added a hanging sleeve in the top of the back so that the new owners can slide a pvc pipe through and then the banner can hang over their booth.
Finished banner ready for delivery.
The background swirls look great and just add to the design, and the letters did not shift or loose their shape.  
I am very pleased with the first try with a banner, now I just need to do some small test pieces to check out edge finishes, stitching over the letters for added emphasis, other methods of adding the hanging sleeve....always something to think about and try to improve.
Here's a close-up of the felt surface.

Tuesday, December 18, 2012

Five Things that I learned or was reminded of again

This is a piece I wrote to present to my local weaver's guild after we had woven a napkin exchange.  I don't remember if the information ever got into the newsletter.  Anyway, it has some interesting things for us to consider when we plan and weave our projects.


1.  Repair 
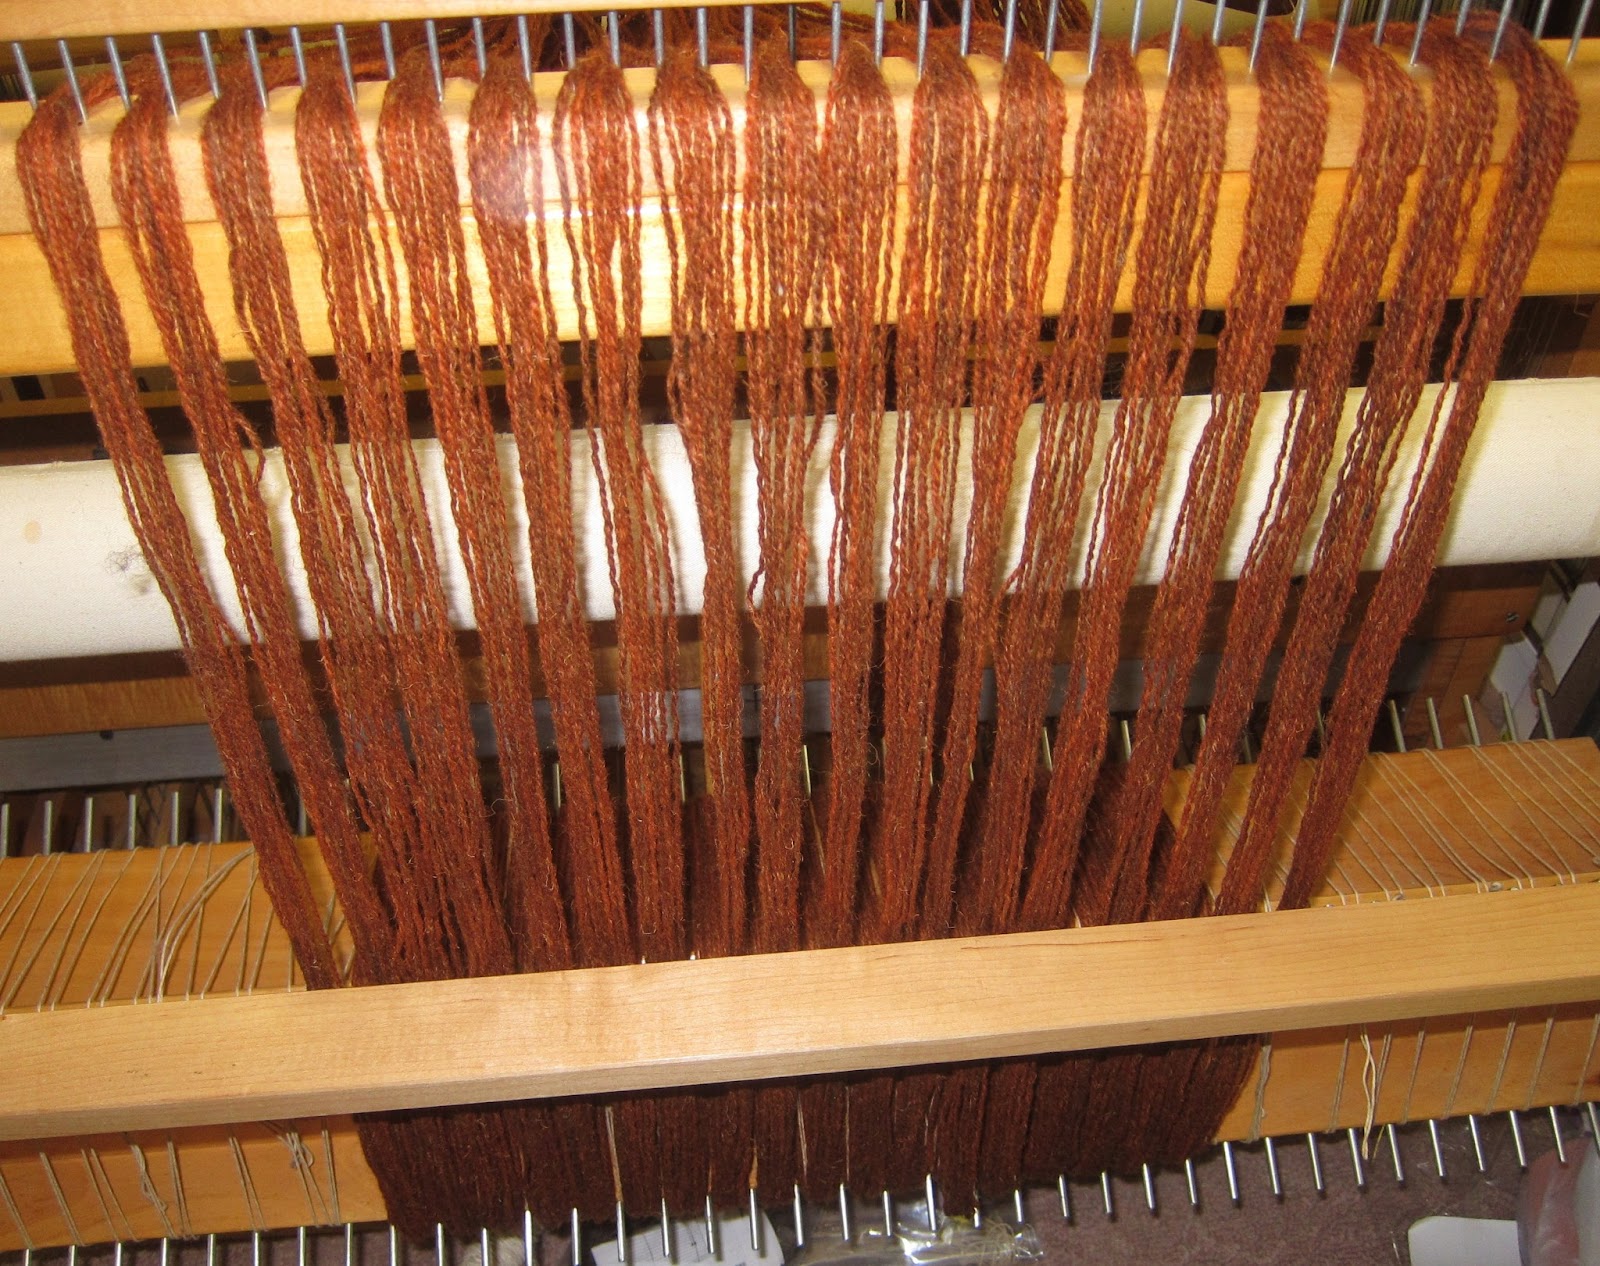
heddles are great and worth the price.
            When I set up my looms, I have a specific number of heddles on each shaft.  I determine this number based on what I usually use.  I have flat steel heddles and they add weight to the lifting so I want to keep the weight down.
            As you know the heddles have an up and a down and a right and a left and there are two types that alternate when you have them on correctly.  Having the heddles on correctly makes threading faster and easier for me.
            When I planned this warp, I needed 74 heddles on four of the shafts and 76 on the other four.  This loom has 75 heddles on each shaft, so I knew I needed to add to four shafts.  Usually when I add shafts I add them in groups of 25 (that is the number of heddles in each group I store).  Adding heddles is a lot of work, and for only one heddle, I decided to just add a repair heddle.  You can tie in a string one, but in my case I found 4 repair heddles that I have to fit this loom.  It took about 5 seconds each to slip the heddles on and I did not have to remove anything from the loom/shafts to do it.  I love repair heddles and they are worth the price.

2.  Wind the bobbins, pirns, or quills well for easier weaving.
            A well wound source of yarn that is not loose, will help the weaving be more even.  To wind a quill, you need to know a few things.  The heavy paper you use for the quill should be about ¾” shorter than the bobbin space in your shuttle.  I like to have the length of the paper about 1½ times the width of the paper.  When you wind you need to start by building up the ends.  These bulges replace the flanges on the bobbins that you buy. You want to build it up to be just smaller than the opening for the bobbin.  I need to be careful building these, I hate it when the ends of the quill collapse   When the two sides are built up, fill in the center.  You want to add tension to the yarn so each layer that you build does not dig into the layers below it.  (If you wind it too loosely, the upper layers dig in and then don’t feed out evenly when you are weaving.) 
Bobbins, quills, or pirns – the way you wind them will determine how even your thread feeds out and how even and pleasurable the weaving is. The finer the yarn is the more this matters.
On pirns, you need to wind in a continuous cone shape.  Start at the wide end of the pirn and build the shape across the length, do not back up to fill in the narrow sections, just continue building the cone to the end.

3.  Test the sett, but it doesn't always help because different types of yarns beat differently.
            As I was putting the warp on about 2 weeks ago, I did not put a sample warp on to test the sett.  I went by the instructions given, which was just a general suggestion.  With the pattern that I used, I probably should have used a more open sett.  Due to this closer sett warp, I need to do a very hard double beat to come close to squaring my pattern.  Also, the Webs pearl cotton was harder to beat in.  Is this difficulty because the yarn is a little bit thicker, or because the twist is tighter, or because the twist is the opposite direction?  And will that direction of twist change the look of the pattern?  That is a lot to think about.


4.  After you figure your warp requirements, wait a few hours and recheck them.
By miscalculation I received 8 different yarns, but only gave out 7 of mine.  I knew this but at the time I was figuring my amounts (two weeks ago in a rush), I didn't take that into consideration.  I had planned on having 12 napkins and so I figured the amounts for 12 napkins, instead of the 13 I needed to weave.  I also messed up with the take-up.  For some reason having the on loom width of 20 (I didn't have to figure shrink and take-up), I didn't figure shrink and take-up on the length.  Big mistake on my part, because I got 11½ napkins instead of the 13 I had wanted to weave so that I would have a set of 12.  I didn't realize the math mistake until the warp was almost woven and the weaving was not long enough.  I checked back on my math figuring and found the glaring mistake.  Oddly enough I made this mistake the same week I was teaching “Figuring your Warp” in my beginning weaving class.  I always tell my students to get an experienced weaver to check the math if you are not sure.  So I want all of you to be aware, next time I figure a warp, I may be giving you a call to check my thinking. 

5.  Check your loom and keep it in good condition.  Sudden changes in warp tension may not be your fault.
            Near the end of my warp, I suddenly got badly loosened tension on the left side of the weaving.  I looked over the loom to the back beam and warp beam to see if I could see a problem in the warp.  What I saw was a bolt on the floor!  All of that hard double beating of the warp had loosened the bolt and nut at the back.  Of course, I was not able to find the barrel nut.  I’m sure my vacuum will find it later to its detriment.  I went digging around in my tool box and found another nut.  I loosened the warp, adjusted the loom and unwove about 5 to 6 shots to get back to the even weaving.  This experience reminded to tighten the screws and bolts in you loom before you start a project and after you finish it so that your loom stays in working condition.  (A good vacuum job to keep the dust off the loom, and controls the dust bunnies under the loom is also a good goal.)


Wednesday, December 12, 2012

New Projects on the Looms

I got the towels woven and washed, but I do not have a good photo yet.  I need to spend some time getting a good shot.  Here is a close up of the structure.  On the unwashed side you can see the stitchers and on the washed side they are hidden and it looks like regular basket weave.  
When I heard about the structure in a workshop last year, it was new and exciting, we had not seen anything like it.\.  Then, as I started looking around and I found the pattern in the Mary M Atwater Recipe Book, she was using it in the 1930's.  There is very little new in weaving, we just keep "re-discovering" the things over and over.


When I finished the towels, I decided to put on the Lichen Scarf.  That gives me two new projects on my looms.  I am bouncing back from loom to loom doing weaving.

I love the block twill, and now it is the correct pattern so I am very pleased with it.


I also put a new warp on the Big Mac.  I have had this project in the queue for a long time.  I got a Christmas towel from a friend years ago.  It was one of those printed towels, the 12 days of Christmas, but I loved the structure of the weaving.
Here is the towel showing the 12 days
But look at that cool structure
I spent some time figuring the threading...of course there were some threads missing but I got a "basket weave variation."  I also want to develop a waffle weave variation. 

But for this project I want to make picnic napkins to match the dishes in the picnic basket.  It took me some additional time to get the yarns that fit my color requirements.  I found out about a sale on cotton/linen yarn and got the colors to do my piece.
My mismatched dishes are tied together with the napkin!
The hardest part so far was tying up the treadles.  The pattern has sixteen shafts and sixteen treadles and 128 tie ups.  My poor body after 30 minutes under the loom.  I had forgotten how hard and time consuming it is to tie up that many.
Two versions of the tie-up my figuring and the walking version


Wednesday, December 5, 2012

Enjoying My Weaving Time

My classes are over until January, and I am enjoying some weaving time.  I have also put up the small Christmas trees I bought on sale last year.  I had been looking for something to frame the front door and was deciding on these trees.  When I checked them at the store, they had dropped in price and so I bought two for the doorway.  

I took them out last week and added red balls and some green holly leaves...they already had lights. I like the look of them at the front door.

Front door for Christmas
As I said, my weaving time has been productivel.  I finished the towel warp and I have six towels and some samples for the notebook.  I am in the process of hemming them now and I can't wait to see how they will look after they are washed.  
Finished fabric on the cloth beam
A pile of finished towels


When I took the towels off the Baby Wolf, I put on the scarf I designed from the Pont du Gard pictures.  I like the colors from the stone and lichen and I love the memory of being there.
While everyone was taking pictures of the wonderful aqueduct  I was taking close-up pictures of the stone and the lichen growing on it.  I also loved the graffiti ..there was the original 2000 year old numbering system the Romans had used so that the masons could fit the pieces together. And the marks left from the many masons that visited the site through the middle ages.  I guess when you were made a "Master" you traveled to visit the great sites, then signed your name...or your mark if you couldn't read, to show that you had been there.

Yes, I did take pictures of me there, too.

Here is the scarf after weaving.   I had threaded it correctly with the twill block changes in the center of the color stripe, but the first time I wove it, I didn't change the pattern in the right area.  Here you can see the pattern when the block changes at the same place as  the color.

Now here is the redone pattern with the block change happening in the middle of the color change.
I am very pleased with this pattern.  Two block twill patterns are found in many of the books, but this design with the color changing in the middle of the block is one I found in Sharon Alderman's book "Mastering Weave Structures."  

Because of the splicing I am doing at each color change, I am only weaving 26 inches an hour.  On the second scarf, I will have to see if I can be happy with a quicker color change method.

My teaching at Pioneer Craft House is doing pretty good.  The classes last quarter filled nicely.

I have been having fun going through the old textiles there.  I have been washing and hemming some of them to use for class examples, to decorate the Weaving Studio there and just to look at the craftsmanship of them.   

A few of the woven pieces have labels in them and I recognize some of the weaver's name from reading old "Handweaver and Craftsman" magazines.  But check out this table cloth.  I don't think it is handwoven, but the workmanship is wonderful.

This piece has stitchery in the center section and pulled thread work on the side pieces.  I really love the seams...some of them are functional where two fabrics were joined, but some are just decorative to balance the pattern...
Here's a closer shot of the pulled thread work.  I believe the piece is linen, and there is also a slightly smaller one done very much the same.  Were they done by the same person, and when were they done.  I wish there was some information about the textiles, but unfortunately over the years it was all lost.  But I think most of them are from the 1930's and 1940's.

Thursday, November 8, 2012

And So It Begins...Finally

It took me a while, but I got the towels on the loom.  I am quite pleased with the look of the colors.  The blue is a fraction too intense for a great balance between them, but they will look great.  Yarn comes in only so many colors and we need to live with those colors or start our own dye house for what we want to weave.  
The yarns wound on very easily
When I got to the end of the winding I noticed a little problem.
I think I may have bent my warp board
I wound the warp in two sections.  Either I was bad in how I wound the warp on the loom (we will find the answer to that about half way through the weaving) or I was very tense when I was winding the blue threads on the warping board or I have bent the pegs on my warping board.  I will need to look into that board...I do not want to replace it so I need to see if I have to fix it.

The weaving started out well, it took a little while to get the tension on the shuttle adjusted, but after I got weaving the pattern, it worked and the fabric looks good.
I am very pleased with the pattern.
The pattern is giving me just what I wanted, a basket weave interlacement with sufficient structure to use for a towel.  I do have some questions about the structure though.  Can you see that the blocks line up in pairs?

Maybe you can see it better in the close up. There is a little space in the horizontal line between each of the blocks,  but on the vertical line the space is every other block.  I doubt if this will show up after the washing, but it is interesting to note.  I will probably do a full draw-down on this structure to see why this happened.  Does it have a clean cut on all four sides?  Is it because each block is three shafts?  How does this threading compare to the one Sharon did?  All these questions will be answered in the future.  For now I need to weave some towels for my sister!


On the family front, the four of us went to Southern Utah to hike to "The Wave."  My DD wanted to hike to this feature when we were down here last May, but we found out only 20 people are allowed in per day and you need to be drawn from the lottery to get in.  We tried for tickets while we were down there, but didn't make the draw.  When we got home she started on the internet drawing.  (10 people on the day of - at the tourist office, and 10 people a day - on the internet lottery.)  In August she was thrilled to get an October date.  I was worried about the weather, but it turned out to be wonderful.  (The dirt road to get to the trail-head is impassable in rainy weather.)

The hike is 3 miles in and unmarked.  They give you a page of pictures with little white lines and instructions "hike to the back of the twin buttes as seen in this picture".  My son brought a compass and a topographic map...he felt that was safer.  The paper also said that in the summer the temperature WILL get up to 110 degrees F and with the reflection of the slick-rock it will be even hotter!  Our temperature was about 70 degrees and the clear blue skies were beautiful.  I am so glad we got a time in the Autumn, it was much better that in the heat of the Summer.
Scenery on the hike
We started hiking late morning, so we got to the wave after noon.  It turns out that the formation is quite small and that the only great time for pictures is high noon.  We were too late....so my pictures show some "burn out" where the sun was bright against the shadows we were standing in.  We had fun and hiked about the area.  The colors of the sandstone were fantastic.  I took close-ups of several areas for some color studies later.
Checking out the pond
We found a pond, since this is October the pond must be there all year.  DD and DS found some small water life and took pictures and chased them around with fingers.


They were little "horseshoe crab" looking things about an inch long.  There were also white worm like forms swimming that must have been the larval stage.  It was unexpected to find this kind of life in the middle of the desert.  


Here is my DS setting up for a picture looking down the formation, I am looking up and got the burn out from the sunlight.  I hope he has some good pictures, he is better at Photoshot than I am. 


Me and my DH on the rim at Bryce Canyon
The next day we went to Bryce Canyon and Kodachrome Basin.  Both beautiful places and we wished we had more time to explore.  It has been several years since we hiked down into Bryce and we all wanted to do some hiking, but only had time for pictures from the rim.  

Kodachrome is a place I had never been.  It is smaller than Bryce and a state park instead of a national monument.  We spent some time hiking around, but will have to go back.  There is a nice arch in the back country and up a dirt road.  We didn't have time and felt bad that we couldn't see it.  That is the way we feel every time we spend a couple of days in Southern Utah. We come away wanting to go back to see the things we didn't have time for.


On the road with the tent trailer
My DH rented a tent trailer (a bit of a luxury for us "sleep on the ground in a tent" people), but I was afraid of getting cold like I did camping last year in September.  So we had a heater (yeah) and a working fridge to keep food cold and a nice stove.  We planned the food and took all of it down, but each morning the suggestion came out "Let's go out for breakfast" and away we went.  Then each night when we got back from the exploring and hiking "It's late, let's just go to that great restaurant for dinner."  Since we had been down here last spring (Kanab), we had eaten at a couple a good places and on this trip tried several more.  I was so relaxed on this trip and did not have to cook or clean up after one meal!  It was a luxury trip...


We also had to stop at Mom's in Salina.   The kids had never eaten there.  It is a traditional "greasy spoon" diner and we enjoyed the experience.  But I don't think my foodie kids want to repeat it!

Well, that is why it took me longer to get the warp on I have been playing.  But now I need weaving my towels, put on a warp for Sharon's class next weekend and I found my yarn for the napkins, I just need to double check the waffle weave pattern (16 shaft from a linen towel I was given) and get them on the Macomber. 

 Wow,  the UPS truck just dropped a box of yarn at my house.  I now have the turquoise to weave the yardage I sampled in August and the yarn to do the scarf from the colors of the rock and lichen on the Pont du Gard I took pictures of last June.